Gluten Free Bride- Having my cake & eating it too!

Okay, so I’ve been MIA lately, but for good reason! My wedding is coming up in just a few weeks and all of the festivities have finally started to come together. Now, I don’t know how many of you are married or engaged, but for those singles out there- take this as a warning- Wedding planning is INSANE! Not only do you have to figure out guest lists, dress shopping, registries, etc., but being a gluten free bride has also come along with some interesting challenges!

Now, I’m not going to get too far into all of the wedding planning craziness in one blog. However, I do want to talk about one huge gluten free obstacle we had to overcome! As anyone with food allergies can imagine, one of the most stressful hurdles to tackle was my gluten free wedding cake. I love my fiancé (if that wasn’t already obvious by his title), but he is not a huge fan of all things gluten free. We wanted the cheesy shot of us cutting our cake together and I didn’t want to “miss out” on this at all (so long as there is no smashing cake in my face). We agreed on a sweets table long ago- so our compromise was a gluten free wedding cake along with additional sheet cakes to be served at the sweets table. The sheet cakes would be all his decision, gluten free or not- hey it’s his wedding too!  Trying to get him to agree on a gluten free cake though was surprisingly easy thanks to finding a gluten free bakery.

So yummy! I would get engaged all over just to do this again!

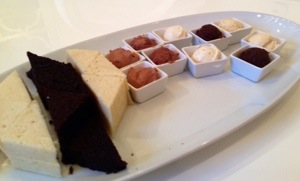
I’m fortunate to live in Chicago where there are plenty of gluten free bakeries around and we found an OUTSTANDING one not too far from our home. Elysia Root Cakes was wonderful to work with. Elysia Root Cakes does not have a retail store and work entirely on specialty cakes. When trying to locate their bakery we may have missed it had it not been for the brightly painted door!. However, when you walk in you are greeted with an incredible display of cakes, pictures of cakes, and aromas to make any diabetic nervous.  For our tasting we were able to request various flavors of cake and frostings which we were then allowed to pair together to “mix and match” to come up with our favorite combination. (In case you are curious, we chose almond, vanilla and chocolate cake along with Bailey’s, Chocolate, Vanilla Bean, and Nutella Buttercream as well as a Chocolate Ganache). Let’s just say my fiance did not want to leave until he ate EVERY bite she had offered us and, trust me, there was plenty!. Surprisingly, we agreed on the same combination and we are super excited (I’ll let you know which combination we chose AFTER our wedding! Don’t want to give too much away just yet!).  I would definitely recommend Elysia Root Cakes to anyone- gluten free or not. She is wonderful and the cakes are delicious. We will definitely be back for our next big party!

Here are some recommendations I have for gluten free wedding cakes and/or alternatives!

  1. Check with your local bakery! You would be surprised to see how many may be able to accommodate gluten free diets!
  2. If a gluten free cake is out of budget (unfortunately they can sometimes be an extra expense on top of an already expensive cake!) check out some gluten free cupcakes.
  3. Compromise! My fiancé loves me and would do just about anything for me. However, I do not expect him to be 100% gluten free and while I would LOVE a gluten free wedding, I have to remember that it is his wedding too. Sweets tables are a great compromise! For ours, we are incorporating a gluten free cake along with his favorite cake (not gluten free!) as well as other sweet treats! Chocolate covered strawberries are always a perfect solution!
  4. Remember it’s not your entire meal! How many gluten free options do you need?!?! Let’s be practical here and not break your budget on sweets! Throw in some yummy candy in decorative bowls and make sure to include your favorite gluten free treats! If you have them wrapped (think mini bars, etc) you don’t have to worry about cross contamination!

xoxo

PS- Ill let you know if anyone notices that it is gluten free!

Gluten Free Shredded Chicken Chili

20140304-135807.jpgChili is a fabulous comfort food, and, if done right, it can be pretty healthy. This recipe does not have a lot of extras and is pretty filling- so long as you don’t add sour cream and cheese to it! I usually make a pretty big batch because it freezes well. If you want, you can allow the chili to cool and store it in small pyrex containers and freeze them in single or double serving sizes! It makes for quick and healthy “frozen dinners.”
  • 16oz can black beans
  • 16oz can kidney beans (use two cans of black beans and two of kidney beans if you want to make a vegetarian chili)
  • 8oz tomato sauce
  • 1 onion, chopped
  • 12oz corn
  • 28oz diced tomatoes with chilies
  • 2-3 chopped jalapeno or serrano peppers (depending on your desired level of heat!)
  • 2 tablespoons gluten free taco seasoning (check it out here)
  • 1 tbsp chili powder
  • 32oz boneless chicken breasts
  1. Place chopped onions, peppers, corn, beans, tomatoes, tomato sauce, taco seasoning, chili powder, and beans in a slow cooker and mix thoroughly.
  2. Place chicken breasts on top of mixture and cover pot.
  3. Cook on high for 5-6 hours or until chicken completely cooked.
  4. Remove chicken and shred into bite sized pieces.
  5. Add chicken back into slow cooker and cook for an additional 10-15 minutes to allow chicken to completely marinate.

You can top chili with cilantro, sour cream, or fresh queso fresco! Just be careful because the sour cream and cheese will add a lot of calories to your meal.  If you need to add a bit more bulk to your meal- try serving it on top of some rice! Delicious!

xoxo

Gluten Free Grown-Up Mac & Cheese

gluten free mac and cheeseMac and cheese was one of my favorite things to eat when I was growing up. I have to admit, I was a mac and cheese snob. That powdered cheese didn’t do it for me and I would ONLY eat the ones that came with the premade “gooey” cheese. Yeah- I know. Processed food is horrible, but at that time, I didn’t know any better.  That being said- I’m still a sucker for mac and cheese. Here is the recipe for my favorite homemade version. I refer to it as my “grown up mac and cheese” because of the various types of cheese added to it.  I usually make a little extra cheese when I’m making it and leave it in the refrigerator for a day or so- it’s great on nachos!

  • 10 tablespoons unsalted butter
  • 1/2 cup gluten free panko OR gluten free breadcrumbs
  • 3 cups milk
  • 2 cups heavy cream
  • 1/2 teaspoon freshly ground black pepper
  • 1/2 teaspoon cayenne pepper
  • 2 1/2 teaspoons sea salt
  • 1/4 teaspoon freshly grated nutmeg
  • 4 cups grated sharp cheddar cheese
  • 2 cups grated Gruyere
  • 1 cup grated parmesan cheese
  • 1 pound gluten free elbow macaroni
  • 1/2 cup all-purpose flour
  1. Preheat overn to 350 degrees
  2. In a small sauce pan, melt 2 tablespoons of butter.
  3. Add gluten free panko (or gluten free breadcrumbs) and coat it butter, cook until slightly browning, then set aside.
  4. Heat milk in a medium saucepan.
  5. In a large skillet, melt 8 tablespoons of butter and, once hot, add flower, stirring until well incorporated (about 1 minute)
  6. Add hot milk into flour-butter mixture. Whisk consistently until the mixture thickens.
  7. Remove from heat and add sea salt, pepper, cayenne pepper, and nutmeg
  8. Add cheddar, gruyere, and parmesan cheese to mixture. Add cheese slowly to allow it to incorporate into sauce.
  9. Boil macaroni according to directions on box. Make sure you stop cooking a few minutes before the recommended time as you want your noodles to be undercooked.
  10. Drain in colander and rinse with cool water.
  11. Add pasta to cheese mixture and place in a casserole dish
  12. Top with buttered panko/breadcrumbs
  13. Bake for 30 minutes at 350 degrees or until slightly browned on top.
  14. Allow to cool slightly before serving.


Enjoy!

xoxo

Gluten Free Kitchen Basics

Gluten Free KitchenOne of the biggest challenges and yet by far the best plan for those with celiac disease is keeping a gluten free kitchen. When I lived alone this was not a big deal at all. After my diagnosis I took EVERYTHING out of my cabinets and the refrigerator and did a major overhaul.  I made sure EVERY crumb was picked up when I dusted and wiped the cabinets down as well as when I scrubbed the refrigerator. Who knows what that spill may have been!?!? It took an entire day but it was definitely worth the effort. I gave a ton of food to my parents and then filled my house with only gluten free food. I didn’t have to worry about reading labels once it landed in my cabinet.  It was my safe zone and I loved it.

Then it happened. I had a “serious” boyfriend. He was always over and had a love for snacks. He tried some gluten free cookies and would eat the pasta I would cook, but one day asked if he could leave some of his favorite snacks at my house- pretzels, cookies, etc. So we came up with a great solution, the basket on one of my shelves became the “gluten zone.” Anything containing gluten went into that container. Eventually my boyfriend spent more and more time at my place and that container had to become a small cabinet. No biggie. I just stayed away from there. It worked out great because it was a part of a small island and that became the area he would prepare gluten containing foods as well. It worked great! When we had friends over, all of the gluten food would go there and my counter space was still a gluten free zone. Woohoo!

Gluten free KitchenWell then he moved in. Damn. I had to share my refrigerator. And pots. And Pans. And well- everything. My fear of cross contamination had become my nightmare. My gluten-loving-Italian boyfriend (now fiancé) ruined my system. For the first month had not been so bad. Unfortunately, after that we both became a bit too comfortable and I spent 4 months miserable. We couldn’t figure out what the source until I decided to do another major overhaul of my kitchen. There were breadcrumbs in the butter.  My lettuce managed to get crumbs from his fried chicken (no joke… apparently men don’t cover food, they just toss things in the refrigerator).  It was chaos. Our solution was to go back to label EVERYTHING. Not only was it great for him to remind him of what he had to be careful with, but it was great for our guests as well!


Here are some of the helpful tips we tried and have really helped:

  1. Label. Label. Label. I purchased “gluten free” labels online and went crazy. Yes you can make them yourself, but these are really cute. I’m sorry. I’m a girl- the prettier the better. Plus, they don’t come off easily and they have even lasted in the dishwasher! Everything in my refrigerator that was gluten free was labeled and placed on a gluten free shelf.
  2. Label condiments and buy two when needed! We have two butter containers and one is labeled gluten free. The reason for doing this is to keep his gluten containing crumbs out of mine! This is especially helpful on those frequently used items!  I put one label on the container itself and one on the lid as well. Not only does this help with quick identification, but it keeps us from mixing them up and putting the wrong lid on the gluten free container. If you put them just on the lids, be careful! If you take the lids off of both the gluten free and gluten containing item you may inadvertently mix them up!
  3. Keep gluten free items on higher shelves. Just in case something spills or isn’t covered adequately, gluten won’t accidentally fall into your gluten free food!
  4. Dedicate a gluten free prep area. No gluten comes into this space. Ever. That being said, I would still wipe it down before cooking just to make sure no crumbs have fallen anywhere. My countertops are gluten free areas but I always wipe them down with a sponge before cooking
  5. That brings us to a gluten free sponge. Yes I have a dishwasher, but I tend to wipe down dishes/pans/etc before putting them in there so I have a gluten free sponge. Sponges can sometimes trap crumbs in the little holes. Your safest bet is to use two separate sponges. Some people color code them so you can remember but we also have a “sponge holder” next to the sink that is labeled gluten free.
  6. Get a second toaster. Crumbs fall and the slots are contaminated if you use gluten free and gluten containing bread in the same toaster. Be safe, get two. We have a tag hanging on the gluten free one as well so no one accidentally grabs the wrong one!
  7. We cook a lot of pasta so we have two colanders (strainers) as well. Those things can be pretty hard to clean with all of the holes so save some time and aggravation and invest in two! Do the same as the toaster and place a tag on it if you can so you know which ones I gluten free!
  8. Invest in a second cutting board. It’s possible to get small amounts of gluten stuck in the “cuts” on the board. They can be hard to remove so I always recommend using two separate cutting boards. Wiping them down does not always do a good enough job.
  9. Using separate baking/cooking equipment. We have designated gluten free pots/pans that are labeled.  It is the same thought process as the cutting board, sometimes things get trapped in small crevices, especially if they are coated pans!
  10. Educate your family. This is especially important when dealing with kids. If you’re living with a gluten free child, those labels make life so much easier for them! They already know what is safe and what isn’t. You may think that you don’t have to worry as much since you are their primary caregiver, but what happens when you’re not home? Grandparents may not be as familiar with their gluten free diet and babysitters may be clueless! This is okay though if things are labeled. They can easily find a snack or meal for them without causing alarm!
  11. Use placemats or at the very least avoid a table cloth. I know it sounds dumb, but using a table cloth can lead to trapped crumbs around your eating area. Unless you are okay with constantly washing it, you may want to skip it if you live with others that are not gluten free. However, if you love your tablecloths, the solution is to use a placemat when eating. This way your area is nice and clean!

Review: Tone It Up Diet & Fitness Plan

Being gluten free is pretty darn challenging at times. Unfortunately, one of the challenges we don’t tend to think about are diet plans. Most people assume that having celiac disease means you are at normal weight or even underweight. However, many individuals are diagnosed while being considered obese. In addition, patients tend to GAIN wait once going gluten free. Why? Well sometimes they are taking in more calories than average to account for what is not be absorbed. Second, gluten free food tends to be heavy in fats and added sugars as I’ve mentioned before. 

I’ve tried a few diet plans in the past and I was a little skeptical about the Tone It Up program. I came across www.toneitup.com one day while looking up some exercise tips and found these two very bubbly girls, Karena and Katrina.  Both girls are amazingly gorgeous and have incredibly toned bodies. Combined with their personalities, they make their workouts fun and entertaining! You know when you watch workout DVDs and everyone is doing stuff in sync while you’re falling around your living room? Not here! The girls switch off between moves and talk you through each movement. AND they lose their balance. It’s great. While doing one video, I stood there balancing on one leg and trying to do an extension on the other without letting my toe touch the ground. Yeah. It’s a great core workout but it can be tricky. While watching the video I noticed that they wobbled slightly too. They aren’t afraid to show their imperfections and it really was a breaking point for me. If they aren’t perfect, why do I need to be disappointed in myself for having the same struggle with a move? Lesson? Keep on doing it. I’ll get there eventually. I hope.

As for the diet plan, you can purchase different versions, including a gluten free diet version (as well as vegan, vegetarian, gluten free vegetarian, & pescetarian). I LOVE THIS. Yeah I know what is gluten free and what is not. I know that bread and wraps are generally off limits, but when I have to go on a diet and figure out a different way of eating, I don’t want to have to figure out gluten free substitutions as I go along. They have taken all of the guess work out of the equation for you. 

The diet consists of a morning drink (I stick with the bombshell spell versus the meta d) and 5 meals/snacks during the day. They teach you what you need to eat at each meal and when to avoid certain foods. Their website is full of recipes they have posted as well as those posted by members of the Tone It Up Community. Yeah- there’s a “community” too. Think of it as a built in support system. You can check in during the day with each other, trade workout ideas, meals, and even meet people in your area to work out with! (I’ve actually met someone on the TIU plan that goes to the same gym I do and we now go to yoga class together occasionally). 

I highly recommend this diet to those looking for something fun and looking for a trainer as well as a nutritionist. One of the biggest selling points for this plan are the workouts. Once each week you are provided with a workout schedule. It changes from week to week so you are never bored. If you choose to just do the workouts, you can check out their website and follow along without paying any fees. There’s no pressure at all! If you decide to do the diet plan, it currently costs $150. That gives you access to download the program and all of the updates/challenges along the way.  I did the exercises for a few weeks before I finally decided to go ahead and spend my money on the diet plan. It’s a great way to see if you think that you will like the plan without having to make any financial commitment!

Hope this helps!

xoxo

New Year? New You!

All right ladies and gents- it’s that time of year again! Let’s start 2014 by making a promise to start taking better care of ourselves. I use the word “promise” and not “resolution” because, to me, a promise is something we tend to take more serious.  The majority of us tend to use January 1st (okay technically January 2nd since most of us are still partaking in holiday indulgences on the 1st) as a restart date. It’s a great milestone to help all of us get to where we want to be and I challenge you to take better care of yourself this year. That can mean you stop smoking, drink less, workout more, start following clean eating principles, or anything else that will positively impact your health.

My suggestion is that you look at the changes you are about to make in “short term” segments. Forget getting in shape for swimsuit season! Instead, focus on what you can get done between now and Valentine’s Day. After then? Challenge yourself to get to April Fool’s Day! Oh come on, you have to appreciate that one. Next? Memorial Day. (Oh and if that seems just a bit to far, push yourself to my birthday- it’s May 16th. Feel free to send well wishes and/or gluten free cake).

Cheers!

xoxo

PS- Feel free to post your New Year’s Promises as a comment to this post to motivate each other!

Holiday Rehab: Peppermint Body Scrub & Cranberry Facial

Phew! The holidays are over! I’m not trying to sound like a grinch because as you know, I absolutely love the holidays. By now, though, all of the presents have been opened (and apparently I was a very good girl this year!), the yummy meals have been eaten, and well… lots of wine seems to have disappeared! All of this clearly means that I had a fabulous holiday season this year, but it also means my body is in need of some serious rehab.

Hitting the gym is my favorite way of rebounding from my holiday indulgences. Not only does it wake you up, but just because it’s the winter doesn’t mean you should slack! Plus burning all of those extra calories will certainly help keep off the holiday weight gain!

Now don’t forget to take care of your skin as well! Make sure to wash your face every morning and night and apply moisturizer twice daily to help beat the dry winter skin! Your hands and feet need extra pampering too! All of those heaters on at home tend to pull moisture out of the air leading to problems with those of us with dry skin! If you happen to be one of them like me, try these recipes to help repair your skin!

peppermint body scrubPeppermint Body Scrub

  • 1 cup sugar
  • 2 crushed candy canes (I’m sure you have some leftover and you need to crush them so put them in a baggie and take out some holiday frustrations!)
  • 1/2 cup coconut oil
  • 10 drops peppermint essential oil (optional but highly recommended!)
  1. Melt coconut oil in the microwave for 30 seconds, or on stove top. Allow to cool slightly and add sugar and candy canes. Mix thoroughly
  2. Add essential oil and mix. You can omit this step if you want.

cranberry facialCranberry Facial Mask

  •  1/2 cup cranberries
  •  1/4 cup cranberry juice
  • 2 tbsp plain greek yogurt
  • 2 tbsp honey
  • 1/2 cup bentonite clay
  1. Puree cranberries and cranberry juice
  2. Add remaining ingredients and mix thoroughly
  3. Place mask in airtight container (I use mason jars)
  4. Store in the refrigerator for up to 5-7 days
  5. To use apply to face and leave on for 10 minutes. Rinse off and continue your normal skincare routine

Enjoy!

xoxo

Gluten Free Fig Cookies (Cuccidati)

Italian Fig CookiesCuccidati, or fig cookies as they are more often called, are one the popular treats that pop up around the holiday season.  A staple in Sicily, these yummy Christmastime cookies are filled with figs, dates, raisins, and a variety of spices! They are a bit time consuming to make, but worth the effort!

Filling

  • 2 cups dried figs
  • 1 cups dried dates
  • 1 cup raisins
  • ¾ cup chopped almonds
  • ¾ cup chopped walnuts
  • ¾ cup orange marmalade
  • ½ cup honey
  • ¼ cup brandy
  • 1½  tsp cinnamon
  • 1/2 tsp nutmeg
  • 1/4 tsp cloves

Dough

  • 4 cups gluten free flour
  • ¾ cup sugar
  • 1 tbsp baking powder
  • ½ tsp salt
  • 1 cup butter
  • 1 large egg
  • ¾ cup milk
  • 1 ½ tbsp. vanilla extract

Icing

  • 3 cups powdered sugar
  • 1 egg white
  • 1tsp vanilla extract
  • 2 tbsp water
  1. Finely chop walnuts and almonds using a food processor and place in a large bowel
  2. Remove hard tips from figs and pits from dates
  3. Grind dates, figs, and raisins in the food processor, until well blended. Add to large bowel.
  4. Place marmalade in food processor with honey, brandy, and spices and blend. This will also help chop up the marmalade a it so that it is a smooth consistency. Pour into bowl and mix well. Your mixture should be thick at this point.
  5. Cool for at least 4 hours, or overnight
  6. Preheat oven to 350 degrees
  7. Sift flour, sugar, baking powder and salt in a large bowl
  8. Add butter to mixture and blend until well incorporated
  9. Whisk egg, milk and vanilla together then slowly add to dough mixture
  10. Divide dough in 4 sections, making a 18x3in rectangle (I use a pizza cutter to get straight edges once I roll it out. You can make longer rectangles but 12-18 inches is much easier to work with)
  11. Place filling in center of rectangle and roll dough over filling, pinching seam to close completely. Wet you fingers with water to help seal the dough
  12. Roll dough over so that the seam is facing downward, slice into 1 inch sectionsfig cookies
  13. Place on a cookie sheet and bake for 15 minutes until golden brown
  14. Allow cookies to completely cool
  15. Whisk together powdered sugar, vanilla, egg white and water. You may need to add additional water if it is too thick. Icing should be easy to spread and drip a bit down the sides of the cookies, but not watery
  16. Apply icing to cookies and decorate with colored sprinkles.

Enjoy!

xoxo

Gluten Free Shampoo & Conditioner

gluten free shampoo & conditionerThe decision to use gluten free shampoo and conditioner is entirely individual. Some people recommend using them, others do not. Now, please mind you that I’m simply sharing my OPINION on this sensitive subject. For myself, I try to use a gluten free shampoo and I do recommend it for my patients (please note that I’m a pediatrician so my patients are kids).  Gluten is not absorbed through the skin and I know that we generally do not go around eating our shampoo.  HOWEVER, kids do. They are constantly putting things in their mouth and I do not want to trust that they will keep their mouths completely closed while bathing. So yes, I do recommend gluten free shampoo and conditioners for kids.

As for myself, I have the annoying habbit of playing with my hair and yes, I can admit it, I sometimes use my mouth to hold sections while curling my hair. Don’t judge, you know you do it too.  This doesn’t mean I won’t use a shampoo that isn’t gluten free. Of course I will, I’m just much more careful when I’m using it. I don’t question it at the salon because I do not have the risk of getting it in my mouth when rinsing it out.  There are a few gluten free brands that are easy to find and very reasonably priced- you may be using them already and not even know it!  Lots of people with celiac do not use GF shampoo and conditioner and do very well. Others feel that it does cause a reaction and choose to use GF products.  If you opt to use them, here is a short list to get you started!

California Baby Skin Protectant Shampoo & Body Wash California baby is great- their website lists if there is gluten in their products or not. I highly recommend them if you’re just getting started because their website is very user friendly!

Dove Damage Therapy– Dove is great with their labels, if it contains gluten, it’s usually written on the ingredients list.

Intelligent Nutrients Harmonic Hair Care Smells great and works amazing but pricey!

Kirkland Signature Moisture Shampoo & Conditioner This is one of my favorites! It’s from Costco and very reasonably priced! It works great!

Savonerrie -great source of GF products

xoxo

Lithuanian Kugelis

Gluten free kugelisIn my family, Christmas wouldn’t be complete without one of our favorite dishes- homemade kugelis. Kugelis is a traditional Lithuanian dish made of grated potatoes, eggs, and bacon. It’s probably one of my favorite things to eat and once you look over the recipe you will see why- there’s nothing healthy about it! It’s truly Lithuanian comfort food!  It can be a bit tedious to make but it is definitely worth the effort.

Just to note- the potatoes need to be grated. Most food processors just don’t cut it! The texture turns out pretty weird if it is not grated properly. When I was growing up we would use a hand grater and sit for hours grating potatoes for my grandmother. If you’re using a hand grater make sure that you use some vitamin C to keep the potatoes from turning brown. No one wants brown kugelis. Now I’m spoiled and, since I love making this dish, I invested in an electric potato grater. I can pretty well grate 5 pounds of potatoes in under 2 minutes. Gram would be jealous. Also, lots of versions of this recipe call for regular milk, but I grew up using carnation milk in our family recipe. Neither are wrong, but you can play with it and see which you prefer. I’ve heard that you can substitute 1 cup almond milk for the cows milk and it eliminates the dairy component, but I haven’t tried it myself. As for the egg component for you vegans- I tried using the substitutes and I just didn’t care for it as much. Sorry. I tried.

Kugelis is traditionally served with sour cream and/or applesauce so make sure you have some on hand. Some recipes you find will have you adding flour to the mixture but you can easily substitute potato or rice flour to make it gluten free. In this recipe I took one extra step and was able to skip the added flour all together. One of the pain in the butt steps of kugelis is straining the grated potatoes (please go get some cheesecloth and make your life easier). Once you have the excess liquid, aka potato juice, allow it to sit for a few minutes and drain off the liquid. There should be a nice thick white layer at the bottom of your dish- hello starch! Who needs extra flour? Not here! Just add that back into the recipe and tah-dah! Gluten free!

  •  5 pounds russet potatoes
  • 1 1/2 pounds bacon, chopped into bite size pieces
  • 6 eggs
  • 5 oz carnation milk
  • 1 medium onion, grated
  • salt & pepper to taste
  1. Peel potatoes and place into cold water to keep from turning brown
  2. Chop bacon into small pieces and cook until brown throughout. Do not remove bacon from grease
  3. In a large bowl, beat 6 eggs
  4. Add 5 oz of carnation milk and mix well
  5. Grate onions and incorporate into egg and milk mixture
  6. Line a second large bowl with cheesecloth. Don’t do just one layer, I usually use double/triple layers to keep it all together.
  7. Using a hand grater, begin to grate potatoes. You may need to add crushed vitamin C to potatoes to keep from browning. If you’re using an electric grater, you can skip the vitamin C
  8. Squeeze potato mixture with the cheesecloth to drain liquid
  9. Add potatoes to egg mixture and and stir until well incorporated
  10. Allow liquid to rest (just a few minutes) and strain off the liquid, add the remaining starch back into the egg and potato mixture.
  11. Add bacon and ALL of the grease into the large pan and mix well. Yes. All. Of. The. Grease. I told you it wasn’t healthy
  12. Add salt and pepper to taste
  13. Spray a baking dish with nonstick spray
  14. Pour mixture into dish
  15. Bake for 1 hour and 15minutes

Enjoy! (and please spend an extra few minutes in the gym after this one!)

xoxo